Tutorial no. 1
In this tutorial we will install the required software. For simulation part we are going to use Mininet. About platform, so it is recommended that use linux since no extra softwares are needed.
Pre-requisite:- Virtualbox installed.
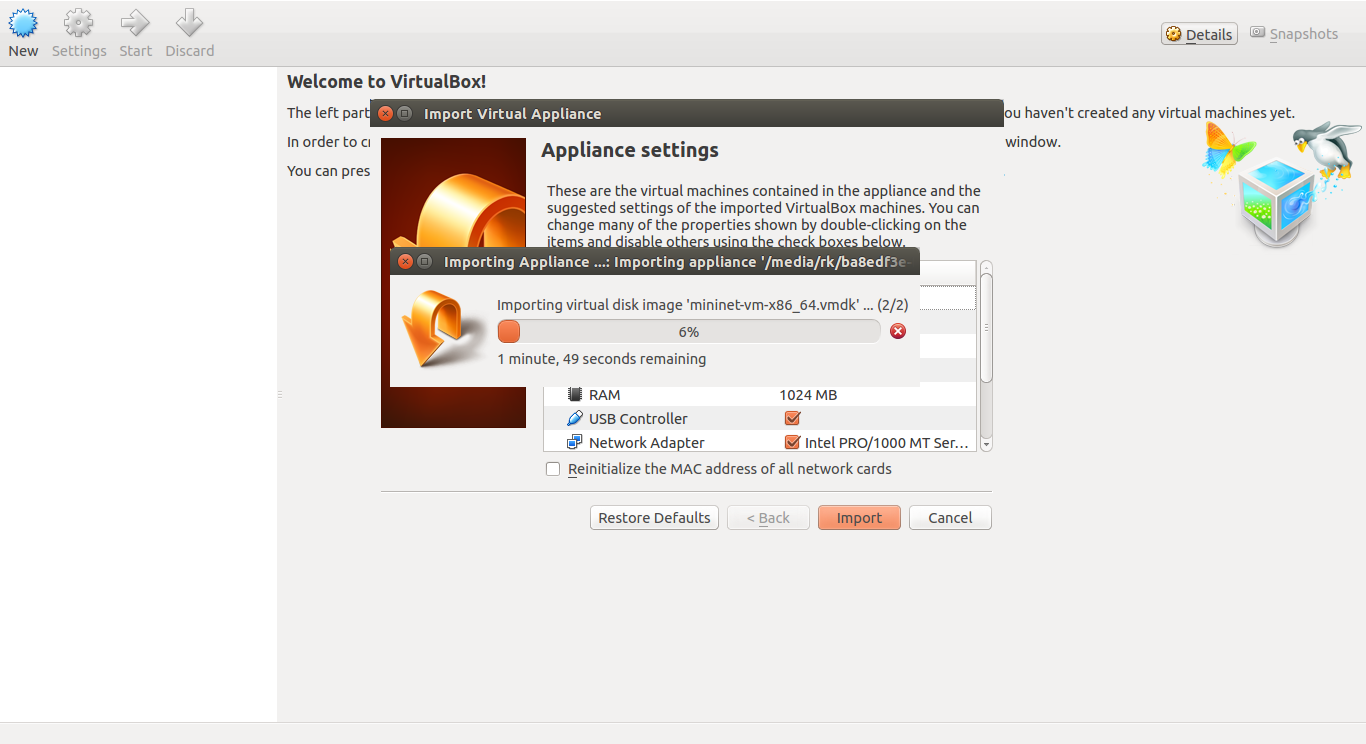
1) Download mininet VM image from here. Extract it click on .ovf image & import vm image to virtualBox.

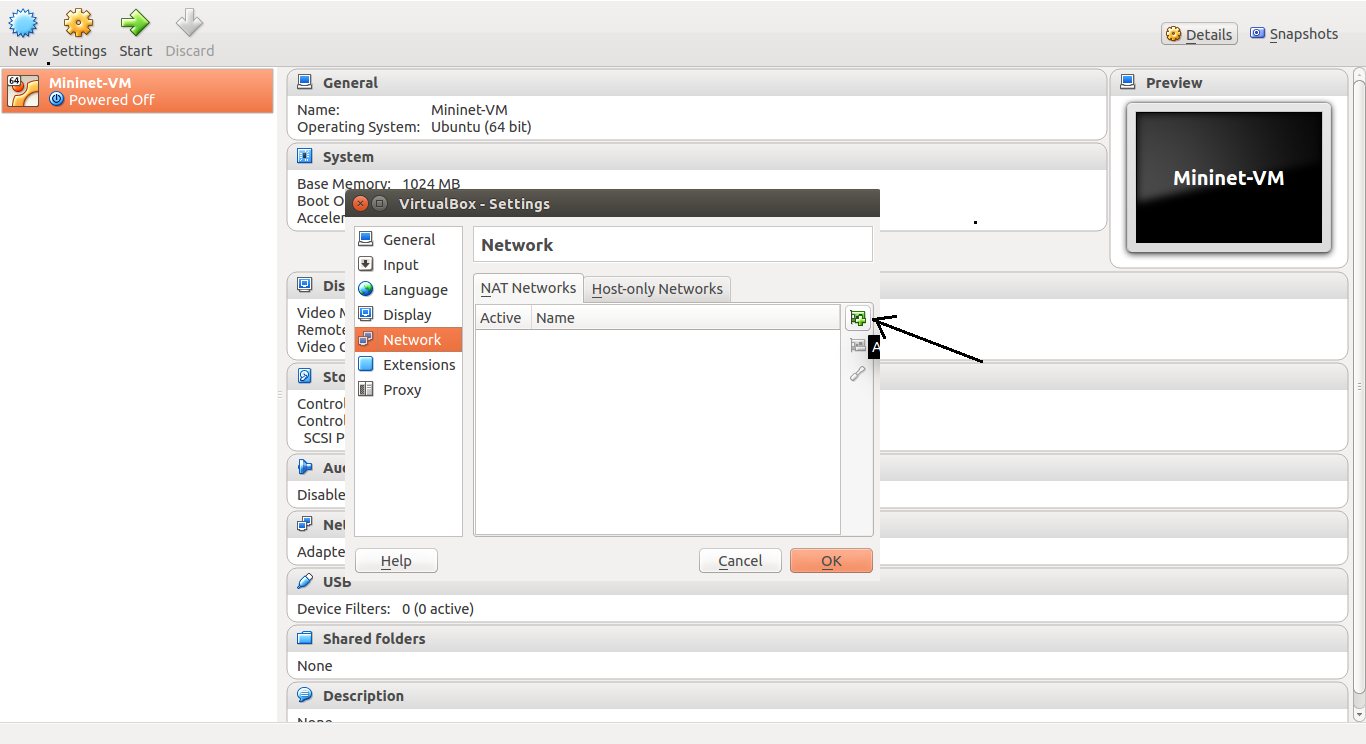
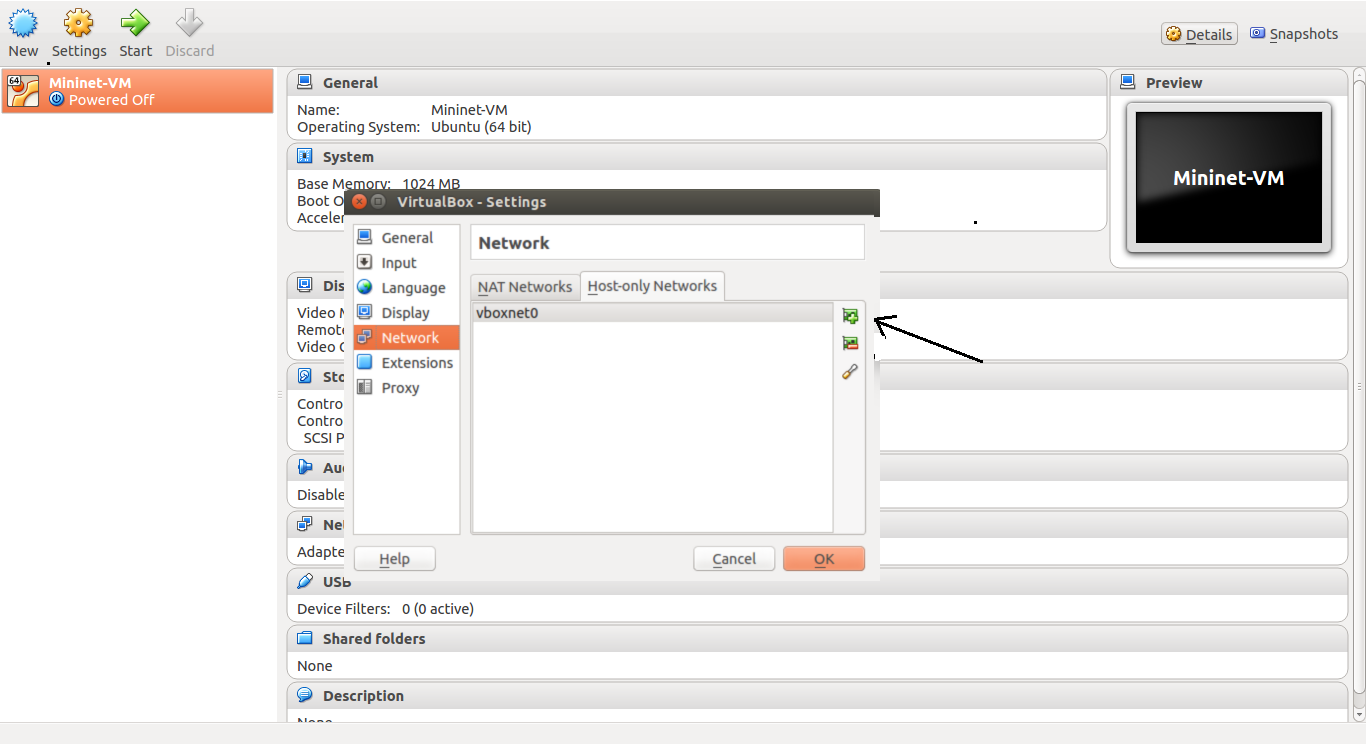
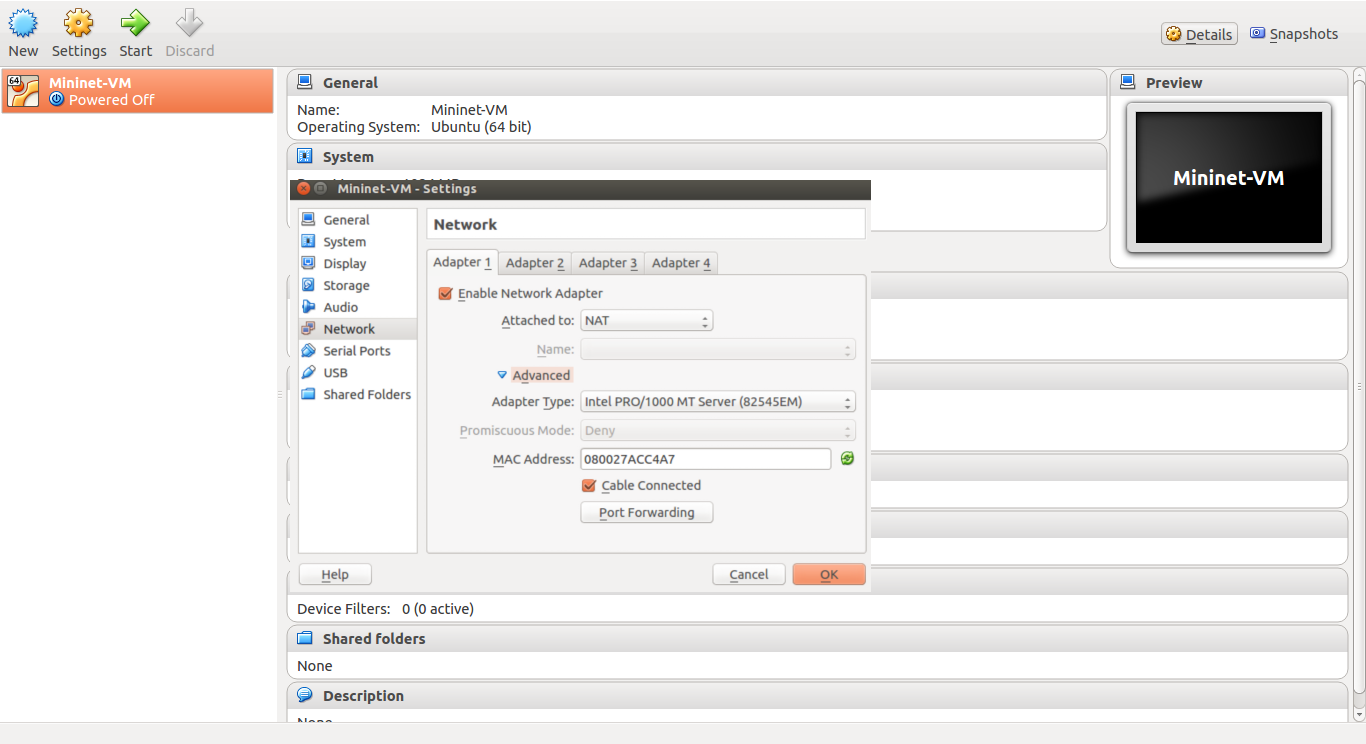
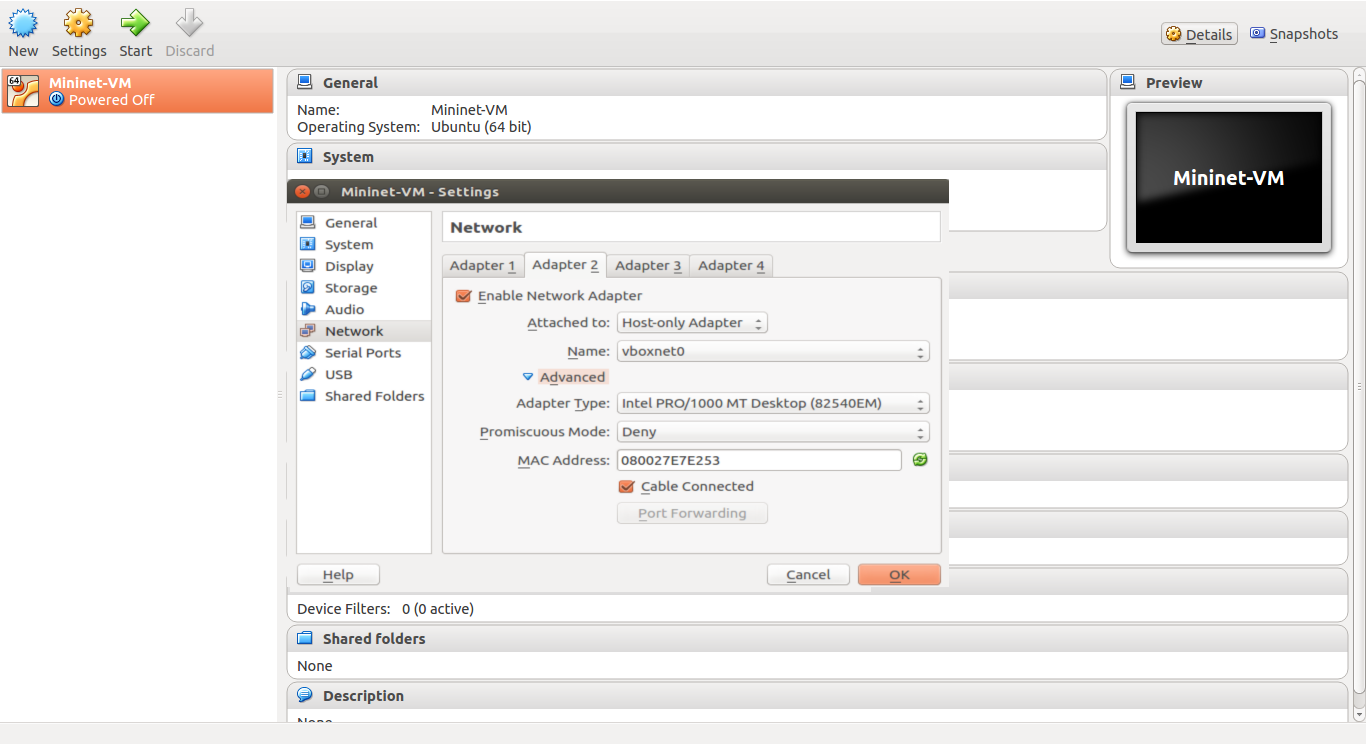
2) If you are running VirtualBox first time, you should make sure your VM has two network interfaces. One should be a NAT interface that it can use to access the Internet, and the other should be a host-only interface to enable it to communicate with the host machine. For example, your NAT interface could be eth0 and have a 10.x.x.x IP address, and your host-only interface could be eth1 and have a 192.168.x.x IP address. You should ssh into the host-only interface at its associated IP address. Both interfaces should be configured using DHCP. If they are not already configured, you may have to run dhclient on each of them, as described below.) Now let’s add network interfaces to VirtualBox. To add network interfaces use key “CTRL+G” .Add ‘NAT’ and ‘Host-only’ interfaces. You can also change DHCP pool address from here.
3) After this we will enable network adapter for mininet. Right click on mininet go to settings>>network and enable network adapter Now select adapter one for NAT and adapter 2 for host-only interface.
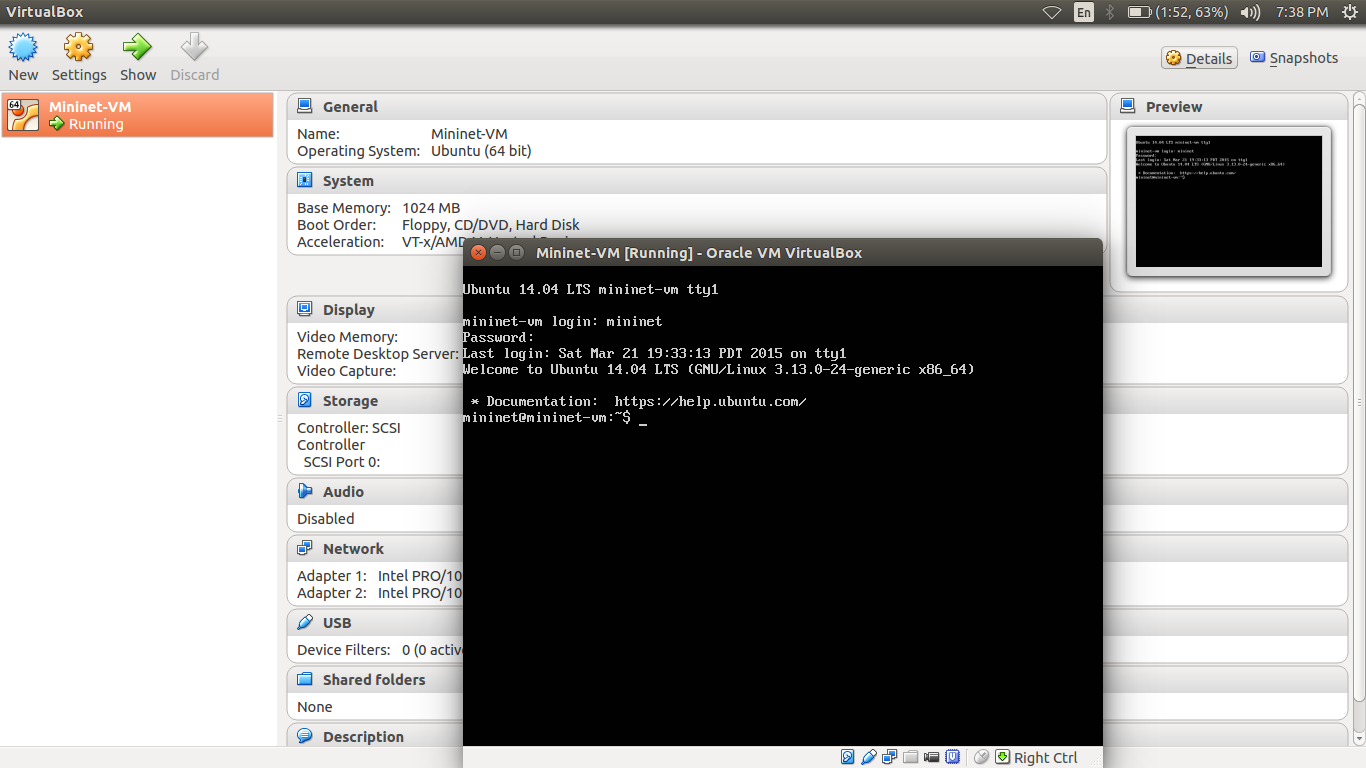
4) We have configured network settings for mininet. Double click on mininet to start
Login :- mininet
Password:- mininet
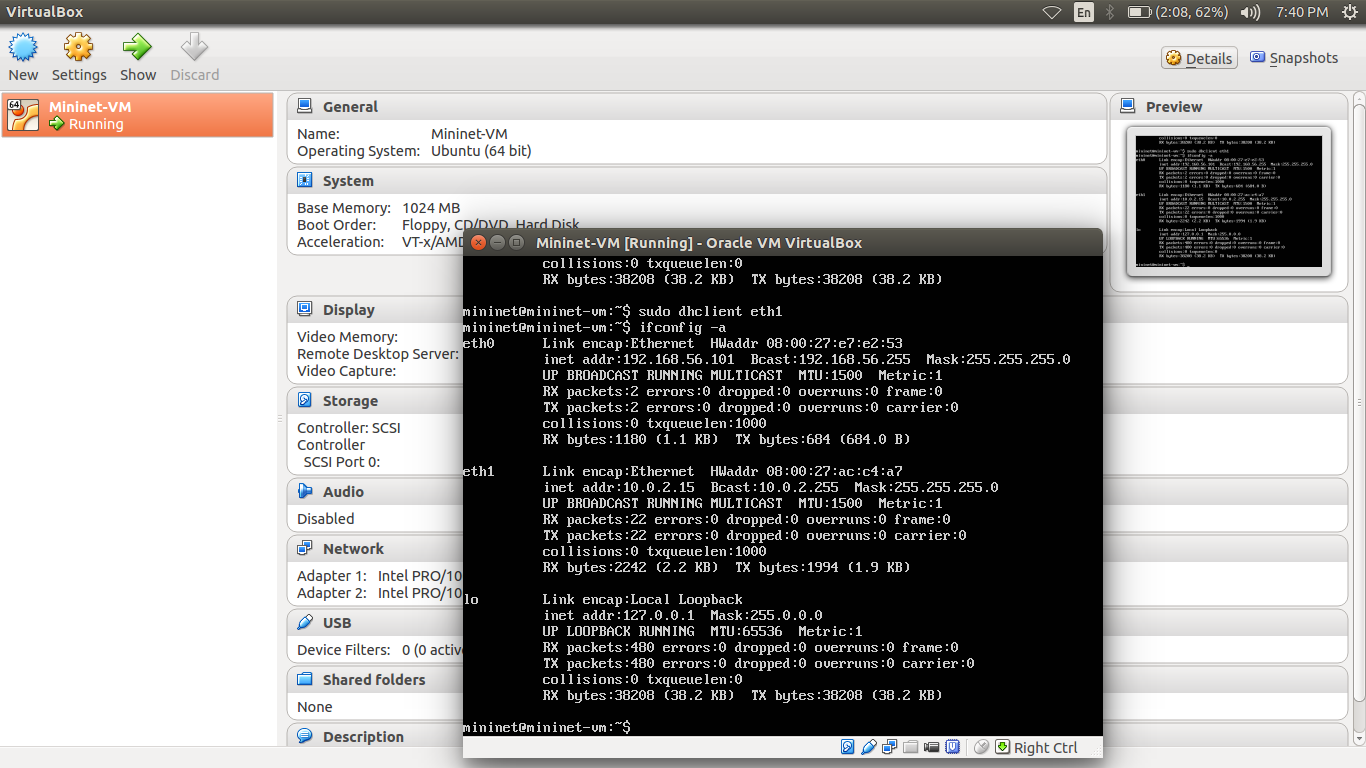
5) ifconfig –a
Will give ip addresses of interfaces. You can see my Host-only interface(eth0) got ip address but NAT (eth1) not got ip address.

Use this command to get ip for eth1 interface
sudo dhclient eth1
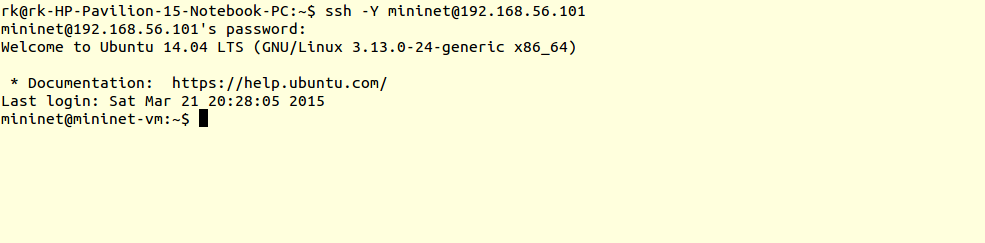
6) We can use host only interface for ssh access of mininet.
ssh –Y mininet@192.168.56.101
Here ip address of host-only interface for my VM is 192.168.56.101