All posts by admin

Introduction to ODL

Tutorial No.1

Introduction  to  Opendaylight

               Before getting started with Opendaylight, let me clear one thing that SDn is not only OpenFlow. It is only single standardized protocol by Open Networking Foundation between ofswitch and ofcontroller for SDN. ONF defines SDN as separation of control and data plane which is nothing but how we get SDN is. But if we know what we are getting in                        SDN we can choose our own path to get SDN.
Now the thing is what SDN gives us is programmability, openness, orchestration, Dynamic Servicing, Simplicity & agility, automation, virtualization of network etc. If this is what SDN is, then I have my own way to get it, said industries.
Opendaylight is an open source software project under the Linux Foundation with goal of furthering adoption and innovation of Software Defined Networking through the creation of common industry supported platform. ODL aims to accelerate adoption of Software Defined Networking (SDN) & Network Function Virtualization (NFV).It is officially started on 8th April 2013 and is based on Eclipse Public License v1.0 [EPL].

helium

               Opendaylight has main three components viz. Network Application & orchestration [management plane], controller platform [control plane], physical-virtual devices [Forwarding plane]. Let’s us try to understand ODL architecture basics. The infrastructure plane may consist physical devices like OpenFlow switches, or virtual devices like openvSwitches. In the management plane there may be GUI/CLI or any cloud mgmt. application like Openstack etc.  build on RESTful / JAVA API and OSGI framework. South bound interfaces includes OpenFlow or other protocols like PCE, XMPP, BGP, SMTP, NETCONF etc. This is what the beauty of Opendaylight controller that supports multi-protocols. And these southbound plugins talks to controller platform & network elements via Service Abstrac tion Layer(SAL). And northbound plugins to expose interfaces to those writing applications to the controller. Also pugins for inter controller connection.
Job of SAL is to create a layer against which the application can be developed without assuming the underlying SDN enabling protocol it’s talking about.

POX GUI


Note : To use this front-end you need to run pox on your local machine,not in a virtual mininet environment

*Requires python to be installed

1.Clone pox from github using –

git clone https://github.com/noxrepo/pox

Else point your browser here & download the zip file

2.Clone poxgui using

git clone https://github.com/abh15/pox-gui-frontend

Else point your browser here  & download the zip file

3.Install mono

-For Windows

Execute poxgui.exe

-For Mac

Download & install latest Mac OS X mono package from here                                                                From terminal cd into the directory where poxgui.exe is located and execute ‘mono poxgui.exe’

-For Linux

Download mono for your distribution from here                                                                             (Ubuntu users can download using ‘sudo apt-get install mono-complete’).                                     From terminal cd into the directory where poxgui.exe is located and execute ‘mono poxgui.exe’


4.

-Give the path to folder containing pox.py

-Select the appropriate log level & run the required script.

-DO NOT run another script without terminating the current script.

-If you get ‘error 48 while binding socket: Address already in use’ force stop python process from task manager or restart the computer


gui

Introduction to SDN

Software-defined networkingis a new approach to networking that brings programmability to network devices which is hitherto unseen in this field. It also enables centralized managing of network devices. It enables programming devices in plethora of languages like Java,Python,Ruby,C,C++.It also promotes open software in networking devices rather than closed source systems which exist today.

Current network scenario is marred by many problems like complexity which is caused by plethora of protocols developed by organisations which are static in nature in contrast to dynamic nature of traffic. Current networks cannot be managed through centralised systems.They are unscalable in nature which make them unsuitable to ever increasing requirements of networks. Also today’s networking industry is a oligarchy consisting of few companies.

We need a new network architecture due to various reasons like constantly changing traffic patterns. IT industry’s rapid embracement of cloud services has created security & complexity problems which need to be addressed. Handling today’s big data means exponential increase in required bandwidth which is hard to satiate. All this problems can be answered using software defined networking (SDN).

SDN is characterised centralised control of multi vendor devices. All SDN enabled network devices can be controlled by a centralised system irrespective of the vendor. OpenFlow-based SDN offers a flexible network automation and management framework, which makes it possible to develop tools that automate many management tasks that are done manually today. OpenFlow‘s flow-based controlmodel allows IT to apply policies at a very granular level, including the session, user, device, and application levels. Main feature of SDN is that it brings awesomeness of open source to networking & thus automatically bringing down the cost of networking devices.

arch

Custom scripts on Controller

Tutorial No.7

Custom scripts on Controller

                      For same tutorial in simulation we have used Virtual Network Descriptor to create topology and controller scripts. If you are new to python coding you can use same controller script directly on our real OFCTL. Refer to Tutorial no.11 in simulation for generating custom scripts.Download the controller script. Put the resultant script in either ext or forwarding directory. Here we’ve used forwarding directory.

 1) Save custom script

custom1

2) Run the script. Here you can see our custom or static flows are installed.

custom

Flow installation with DPCTL

Tutorial No.6

Flow installation with DPCTL

                     DataPathController (DPCTL) is command line tool which sends OpenFlow messages to switch. Using this tool we get switch port and flow statistic also flow entries. We can also add flow rules in OpenFlowswitch using DPCTL. It’s very great tool to communicate switch directly without OpenFlowController.

In this tutorial, we use DPCTL to get flow status from switch and also we will learn how to add flow rule in switch using DPCTL.

1)To see installed flows

dpctl dump-flows tcp:127.0.0.1:6633

         Here we have added flow as we added in simulation tutorial. Also you can verify installed flows using above command.

dpctl add-flow tcp:127.0.0.1:6633 in_port=1 actions:output=2        

dpctl add-flow tcp:127.0.0.1:6633 in_port=2 actions:output=1

dpctl

You can verify results using ping utility.

Simulation scripts on real OFCTL

Tutorial no 4

                   Here we will run scripts that we have ran during simulation session. There will not be any big difference. Remember each  time you have to start openflow so I will avoide this step and show you how to handle with controller. Let’s start with some default scripts.

1) Hub.py

Start openflow

Start controller

python pox.py log.level – -DEBUG forwarding.hub openflow.keepalive

hub

Verify result with ping and tcpdump utility. Also hubifying on controller.

2) L2_learning.py

Start openflow

Start controller

python pox.py log.level – -DEBUG forwarding.l2_learning openflow.keepalive

l2_learning

Verify result with ping and tcpdump utility. Also MAC learning on controller,

3) L3_learning.py

Start openflow

Start controller

python pox.py log.level – -DEBUG forwarding.l3_learning fakeways=192.168.10.1,192.168.50.1 openflow.keepalive

l3_learning

Assign IP from different network(I have used from 192.168.10.0 & 192.168.50.0) to hosts and give fake gateways since openflow doesn’t care about gateways its juast to keep hosts happy. Verify result with ping and tcpdump utility. Also observe ARPing on controller.

4) L2_firewall.py

Firewall script available here download and save it. I have saved in pox>pox>forwarding folder. Edit MAC of hosts as needed. It forward packets listed in script and drops others.

Start openflow

Start controller

python pox.py log.level – -DEBUG forwarding.l2_learning openflow.keepalive

l2_firewall

MAC address 00:26:82:cd:dd:d5 is listed in script hence packets related to it are forwarded else dropped.

5) Port_blocker.py

Download script from here save in pox>pox>ext folder. I have saved with name blocker.py, Also you have to pass port number parameter. I have given port number 8080.

Start openflow

Start controller

python pox.py log.level – -DEBUG forwarding.l2_learning blocker –ports=8080

port_blocker

Verify result by requesting 8080 or HTTP service from host. You can see 8080 packets are get blocked.

6) dhcpd.py

Start openflow

Start controller

python pox.py log.level – -DEBUG proto.dhcpd –-network=10.1.1.0/24 –-ip=10.1.1.1 -–first10 –-last=None –-router=None –-dns=4.2.2.1 openflow.keepalive

dhcp

You can see two IP addresses from given IP network are leased.

Interfacing control & data plane

Tutorial no 4

Interfacing control and data plane

                                In the last two tutorials we installed our python based SDN controller POX, on Raspberry Pi and flashed TPlink 841N v9.0 with OpenWRT image (OpenWRT with OpenFlow 1.0). Also we have configured network and OpenFlow files from our OFSwitch (OpenFlow enabled Switch i.e. TPlink 841 router with newly flashed image here). Now it’s time to interface both control (Raspberry Pi) and Data plane (OFSwitch=router).

1) Connect Ethernet cable between WAN port() of router (OFSwitch) and RJ45 port of Raspberry PI (OFCTL-OpenFlow Controller). Power up router and Raspberry PI. Set up will look like this.()

IMG_20150124_105929425

Note: If you need to set Raspberry pi IP address. Refer this

2) ssh into control and data plane. (Use IP as you set)

root@192.168.0.1                      # ssh to data plane i.e. Router

root@192.168.0.2                      # ssh to controller i.e. Raspberry pi

Now start openflow on Router (192.168.0.1 in my case)

/etc/init.d/openflow start

Simultaneously boot POX on raspberry pi

python pox.py openflow.keepalive

testconn_ctrl

testconn_data

Note:If connection fails, try connecting pi to LAN port no.1 or no.4 of router.

Setting up data plane

The data plane is represented by a router, as most of the routers are closed source we cannot use them out of the box. Hence we use OpenWRT which a open source linux based firmware for unmanageable routers. Prebuilt images of openwrt with openflow 1.0 for LinkSys WRT54GL,TP-LINK TL- WR1043ND (v1.7),TP-LINK TL- WR1043ND (v1.8) are available here.  For TP-link TL-WR841N, pre built images with OpenFlow 1.0 are V9, V10, V11. Otherwise you can flash stock Chaos Calmer 15.05 image and then install OpenFlow 1.0 or OpenFlow1.3 by simple command

  opkg install   <package name>

If your router is not listed you’ll have to build image from source as per instructions here

Its highly recommend to use TP-link TL-WR841N v9, instructions given in this article are intended for WR841 v9 specifically.

WARNING: Flashing an unofficial firmware voids your warranty,and could turn your router into useless ‘brick’. Perform the operation at your own risk.

1.Connect your router to computer & point your browser to 192.168.0.1 ; login with credentials (Username:admin,Password:admin)

2.In left pane navigate to system tools –> Firmware upgrade, Check if the Hardware version is correct. Browse to the downloaded image final_image.bin & upgrade.

41


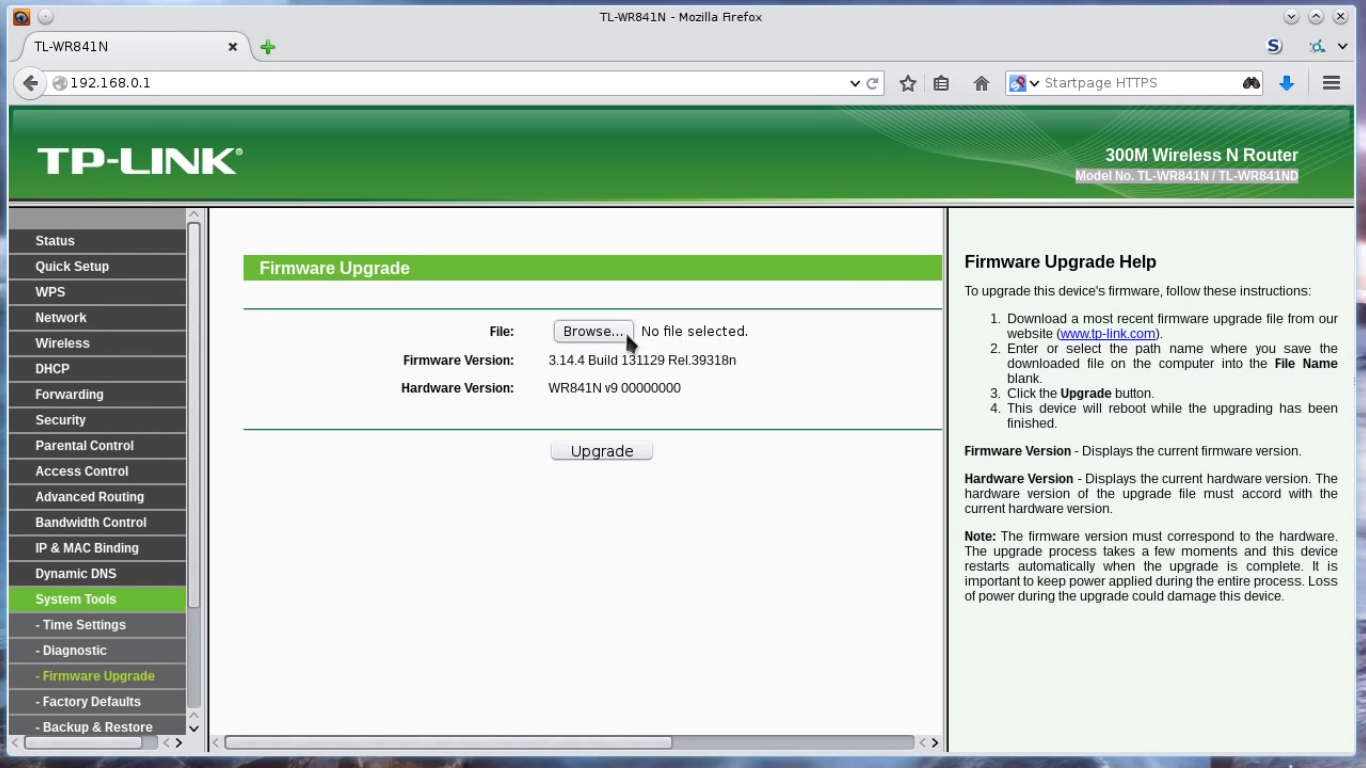
3.Refresh the page after process is completed,the tplink interface will vanish. Reboot router.

4. Through commnandline/terminal run

telnet 192.168.1.1 

51
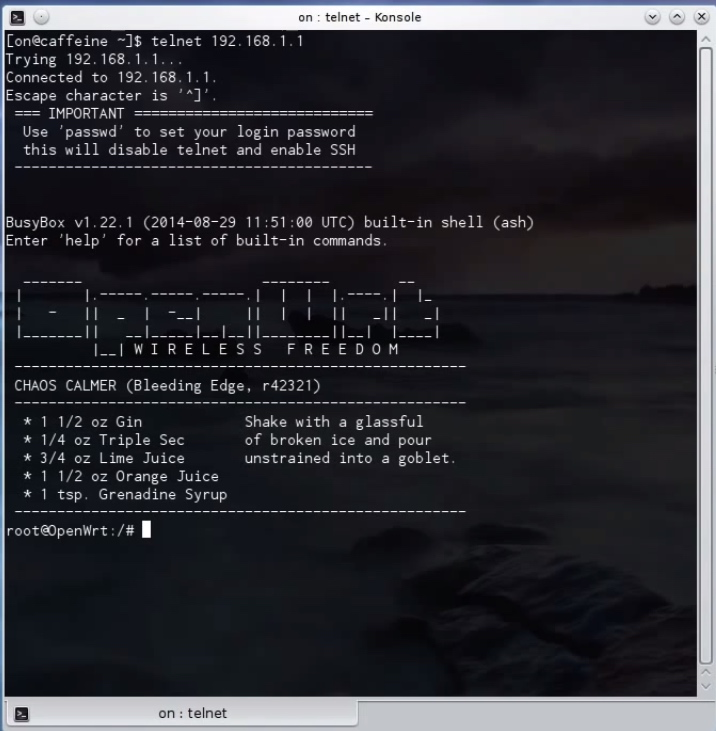
then set password for router access using

passwd

52


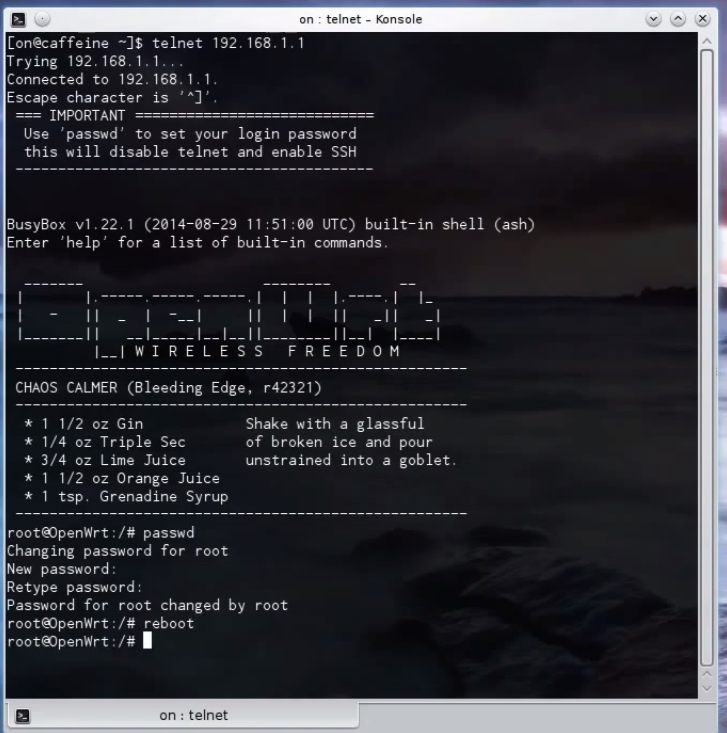
then exit the router using command ‘exit’. To get access of router after this you’ll have to use

ssh root@192.168.1.1

Now following two steps are specific to OpenFlow 1.0 to avoid slicing error.                                 1) Copy functions.sh from lib to etc [25].

 # cp /lib/functions.sh /etc

2) Add –no-slicing parameter to /lib/openflow/ofswitch.sh [26]. After the addition of this parameter, the modified lines should look as follows.

if [[ "$mode" == "inband" ]]
then
	echo "Configuring OpenFlow switch for inband control" 
[ -n "$dpid" ] && {
ofdatapath punix:/var/run/dp0.sock -i "$dpports" --no-slicing
--local-port=tap:tap0 "--pidfile=$pidfile" -d "$dpid" &
	}||{
ofdatapath punix:/var/run/dp0.sock -i "$dpports" --no-slicing 
--local-port=tap:tap0 "--pidfile=$pidfile" &
}
else
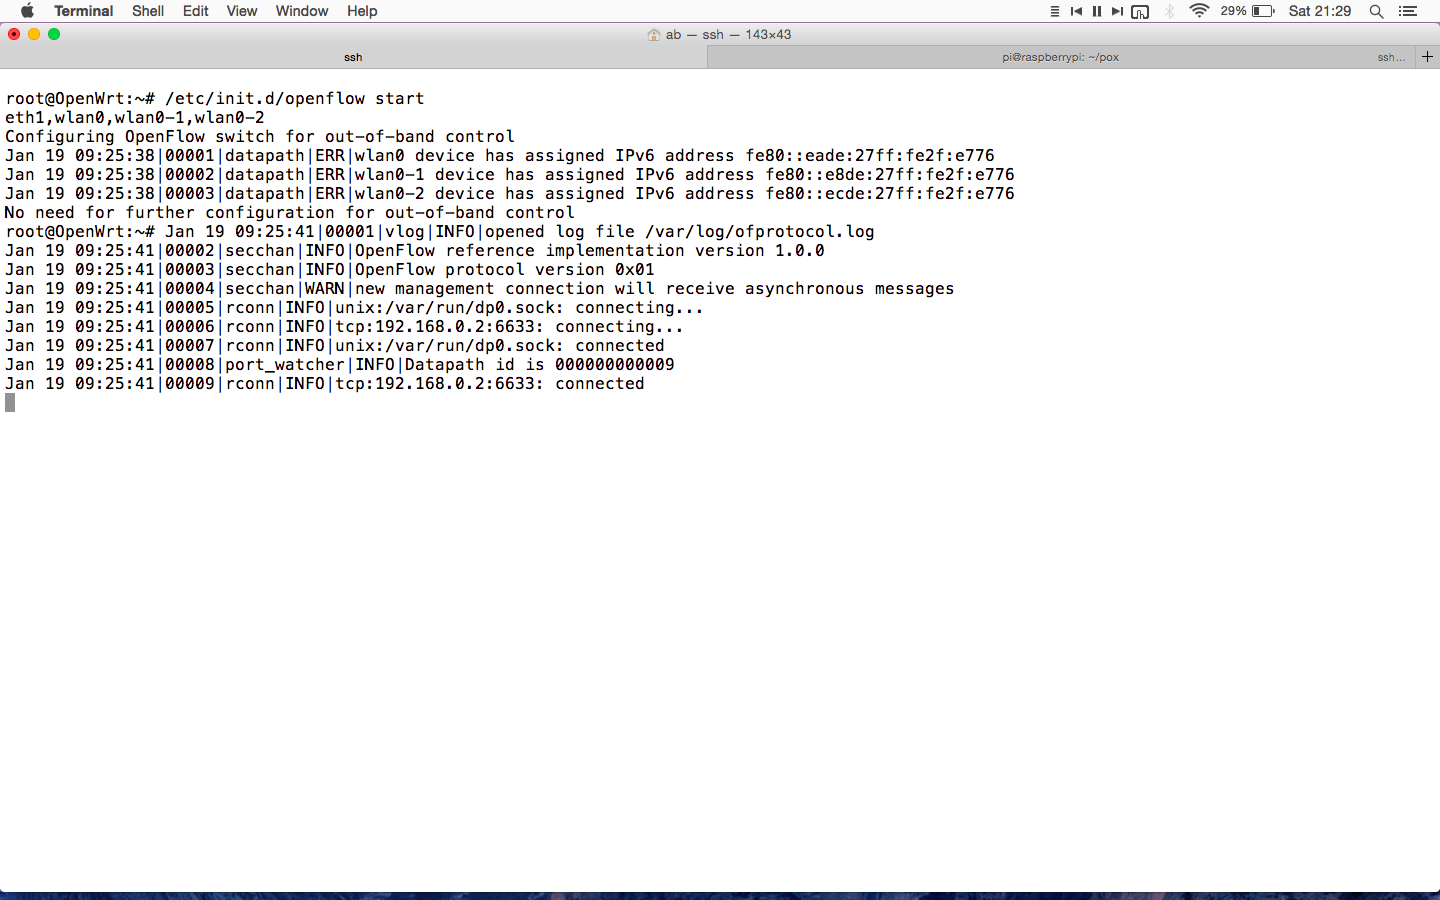
	echo "Configuring OpenFlow switch for out-of-band control" 
[ -n "$dpid" ] && {
ofdatapath punix:/var/run/dp0.sock -i "$dpports" --no-slicing
--no-local-port "--pidfile=$pidfile" -d "$dpid" &
	}||{
ofdatapath punix:/var/run/dp0.sock -i "$dpports" --no-slicing 
--no-local-port "--pidfile=$pidfile" &
}


To set configuration of router

1.Edit the openflow file

vi  /etc/config/openflow

enter ip address of raspberry pi instead of 192.168.0.2


config 'ofswitch'
        option 'dp' 'dp0'
        option 'dpid' '000000000009'
        option 'ofports' 'eth1 wlan0 wlan0-1 wlan0-2'
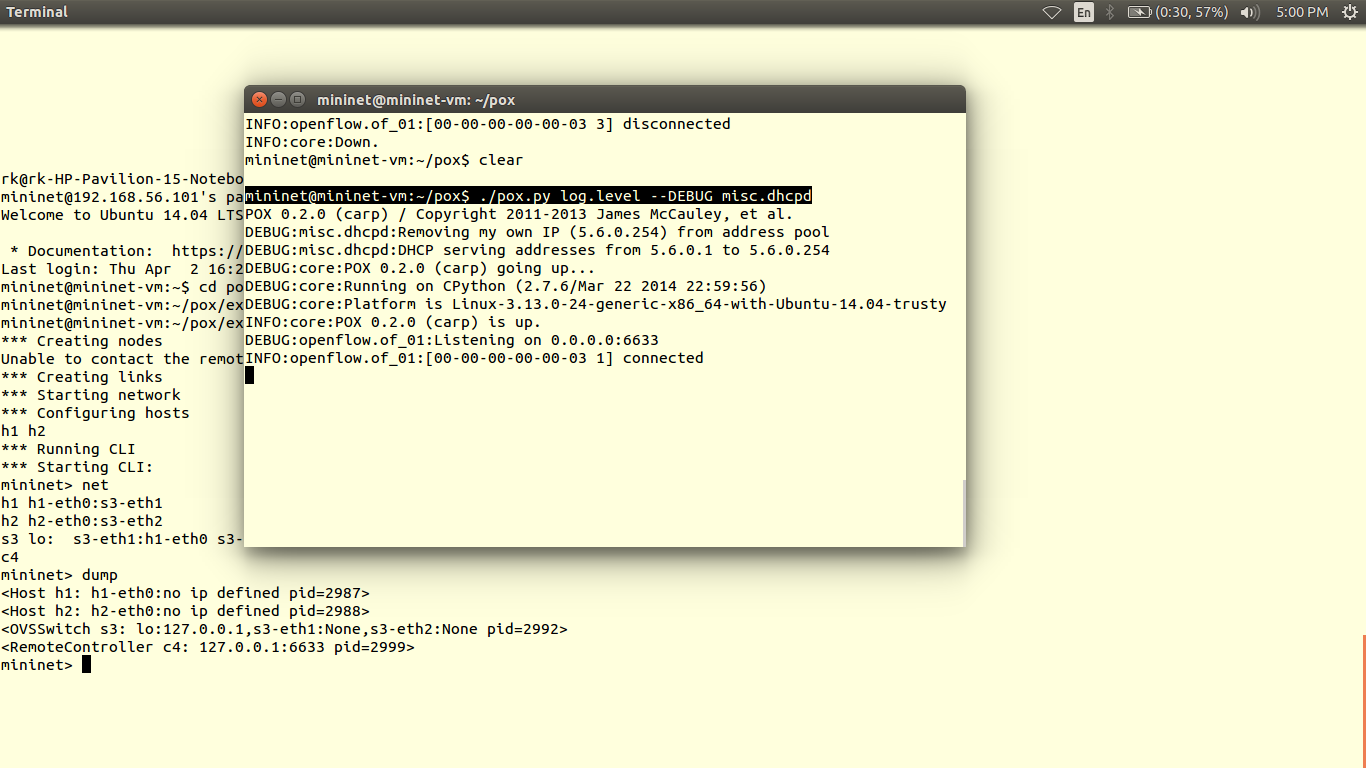
        option 'ofctl' 'tcp:192.168.0.2:6633'
        option 'mode'  'outofband'

2. Edit the network configuration file

vi  /etc/config/network


config  interface 'loopback'        
    option ifname 'lo'              
    option proto 'static' 
    option ipaddr '127.0.0.1' 
    option netmask '255.0.0.0'         
                                    
config interface 'lan'                                              
    option ifname 'eth0.1'         
    option proto 'static' 
    option type 'bridge'
    option ipaddr '192.168.0.1' 
    option netmask '255.255.255.0'  

config interface 'wifi'
    option proto 'static'
                                   
config interface 'lan2'             
     option ifname 'eth0.2'         
     option proto 'static'          

config interface 'lan3'             
     option ifname 'eth0.3'          
     option proto 'static'           
                                                                      
config interface 'lan4'             
    option ifname 'eth0.4'          
    option proto 'static'           
                                    
config interface 'wan'              
    option ifname 'eth1'            
    option proto 'dhcp'

config switch                                                        
    option name 'eth0'              
    option reset '1'                
    option enable_vlan '1'          
                                                                
                                    
config switch_vlan                                               
    option device 'eth0'                                          
    option vlan '1'                                             
    option ports '1 0t'             
                                                                  config switch_vlan                                         
    option device 'eth0'                                   
    option vlan '2'                                          
    option ports '2 0t'             
                                                                 config switch_vlan                                            
    option device 'eth0'                                      
    option vlan '3'                                     
    option ports '3 0t'             
                         
config switch_vlan                                          
    option device 'eth0'                                   
    option vlan '4'                                     
    option ports '4 0t'


3.Edit the wireless configuration

vi  /etc/config/wireless


config wifi-device  radio0
	option type     mac80211
	option channel  11
	option hwmode	11g
	option path	'platform/qca953x_wmac'
	option htmode	HT20
	option disabled 0

config wifi-iface wlan0
	option device   radio0
	option network  wifi
	option mode     ap
	option ssid     OpenWrtOne
	option encryption none


config wifi-iface wlan2
       option device   radio0
       option network  wifi
        option mode     ap
        option ssid     OpenWrtTwo
        option encryption none

config wifi-iface wlan3
        option device   radio0
        option network  wifi
        option mode     ap
        option ssid     OpenWrtThree
        option encryption none

config wifi-iface wlan5
        option device   radio0
        option network  lan
        option mode     ap
	option ssid OpenWrtXS
	option encryption psk2
        option key  openwrtxs 


Setting up control plane

As we have decided to use raspberry pi as controller, we will see how to install our python based controller POX in this tutorial. Before that it assumed that you have installed a raspbian operating system on Raspberry Pi. You can refer this tutorial to install raspbian.

Its highly recommended that you do not use headless configuration(without connecting keyboard,display etc.) for Raspberry Pi, still if you’re keen on using headless configuration for sake of portability, follow this guide and set up a static ip for Pi so that you know which ip to ssh to.

1)  Boot pi by connecting it to 5v power supply.
2)  Login using default credentials                                                                                               username:raspberry                                                                                                                                                 password:pi
3)  Run
git clone http://github.com/noxrepo/pox
cloning will take some time.piscreen1

dhcp

Note: Google Drive links may not work or might be expired. You can find the scripts here

Tutorial no 7

                                         Dynamic Host Control Protocol (DHCP)  configuration allows dynamic IP address allocation to hosts in network. Certain IP addresses range is defined called DHCP Pool. When host are connecting to network node they request IP address from DHCP server. And from DHCP Pool IP address is assigned to hosts. So, we don’t have to manually give static IP addresses to hosts.

                                      In the POX we have default script called dhcpd in the folder pox/pox/misc which gives ip to host from the range 192.168.0.0 to 192.168.0.254. This is default range of this script. You can modify according to your need. I have modified to 5.6.0.0 to 5.6.0.254 , which is new DHCP pool.

1) Mininet by default assigns IP address to hosts. So, I have made topology script with two hosts & with no IP assigned to it. Script is available here. Save the topology script in pox/ext location. You can use command line editor nano. Copy the code and save using key ‘CTRL+O’

1

2

2) I have saved script with name mininet-test.py, run script using command

sudo python ./mininet-test.py

3

3) You can check host has no IP by default by command

dump

4

4)Now run script dhcpd.py from pox/pox/misc on controller.

./pox.py –log.level – -DEBUG misc.dhcpd

5

5)Lets check our hosts got IP address from DHCP server or not.

Xterm h1 h2                                                                                                                                                             Ifconfig

6

Unfortunately not. This script is not perfect DHCP.

6) In general hosts request IP from DHCP server automatically. But here we have to request DHCP server from host mannualy. I know its quite disappointing.

sudo dhclient h1-eth0                                                                                                                                              sudo dhclient h2-eth0

Now you can see, our hosts are happy with newly assigned IP addresses. To check IP use command,

ifconfig -a

7

                         You can see hosts  have now IP addresses from the pool 5.6.0.0-5.6.0.254, note that default pool is 192.168.0.0-192.168.0.254 & this script edited with new pool. You can also pass the parameters to define new pool.